

Earlier this year, Microsoft released some new features for preview that are being fully rolled out near the end of November 2022. Of these new features, I want to focus on improving the effectiveness of Microsoft Authenticator.
By default, this app will only show you a base Approve or Deny prompt from the application. The new features allow you to show the IP address and geo-location area of the authentication and the app that’s trying to be logged into. It’s a much more secure implementation over previous behavior. Let’s dive in.
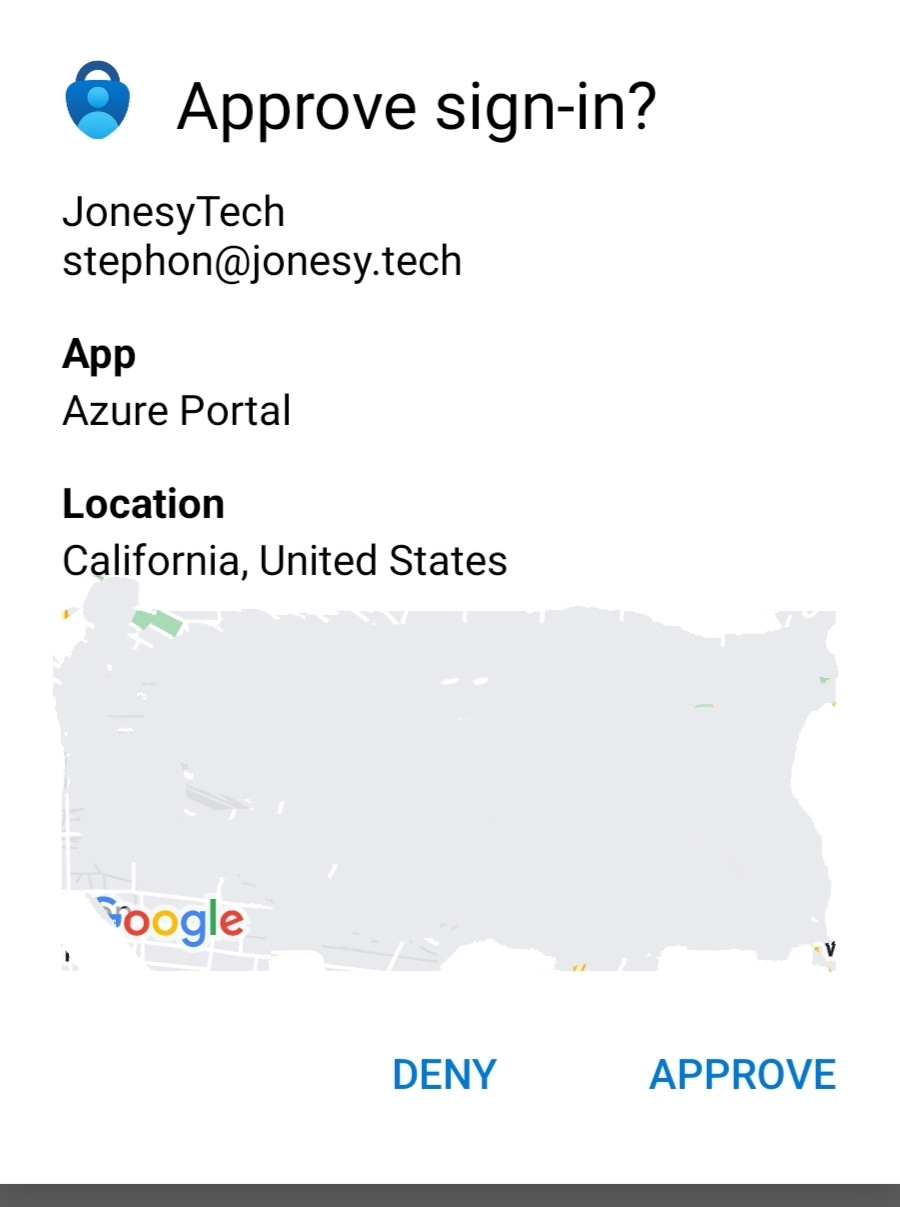
Microsoft Authenticator Prompt
Step 1 – Authentication Methods >> Microsoft Authenticator
Log into the Azure portal, search for ‘Authentication Methods’ in the search bar at that top. Go to that menu. You should see a title pane like the one below.
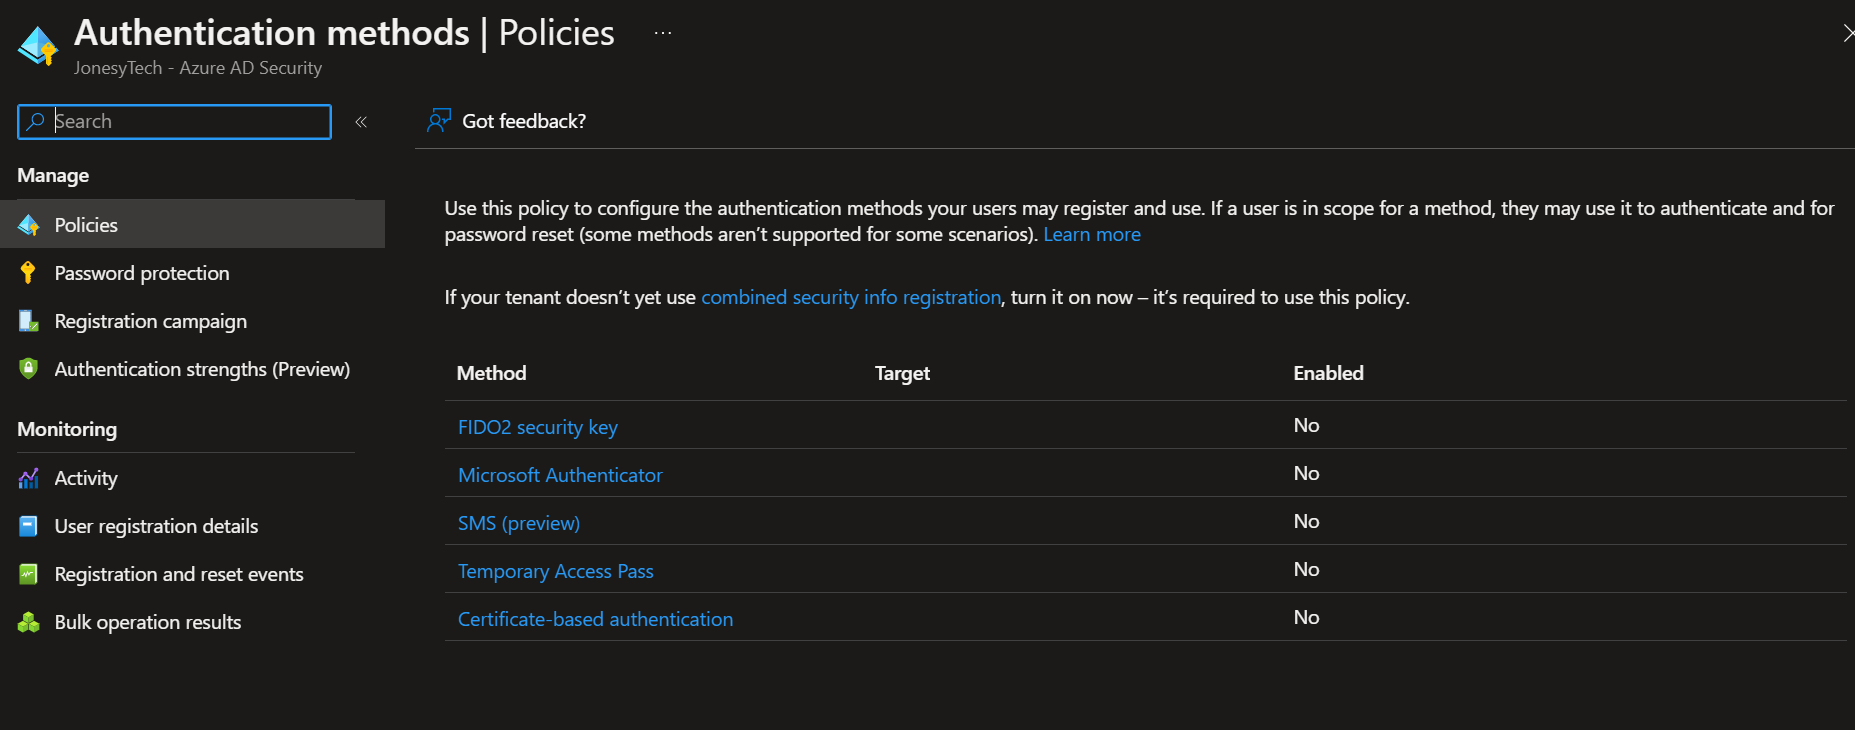
You’ll see some authentication methods below here. Depending on your organization and the type of security you’re trying to enable for your authentication, you may need some more advanced/coordinated methods like a FIDO2 security key (think Yubikey or Windows Hello) or a certificate.
Today, we’re sticking with Microsoft Authenticator. It’s a great tool to use if you’re already using it to enforce multi-factor authentication in your environment. If you’re just trying out these new auth methods in a lab environment or UAT group, it’s a safe and easy place to start.
(I personally wouldn’t try SMS-based login without some additional security measures pre-configured)
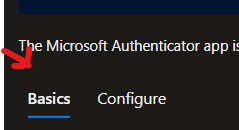
Click on ‘Microsoft Authenticator’, and you’ll reach a screen like the one below.
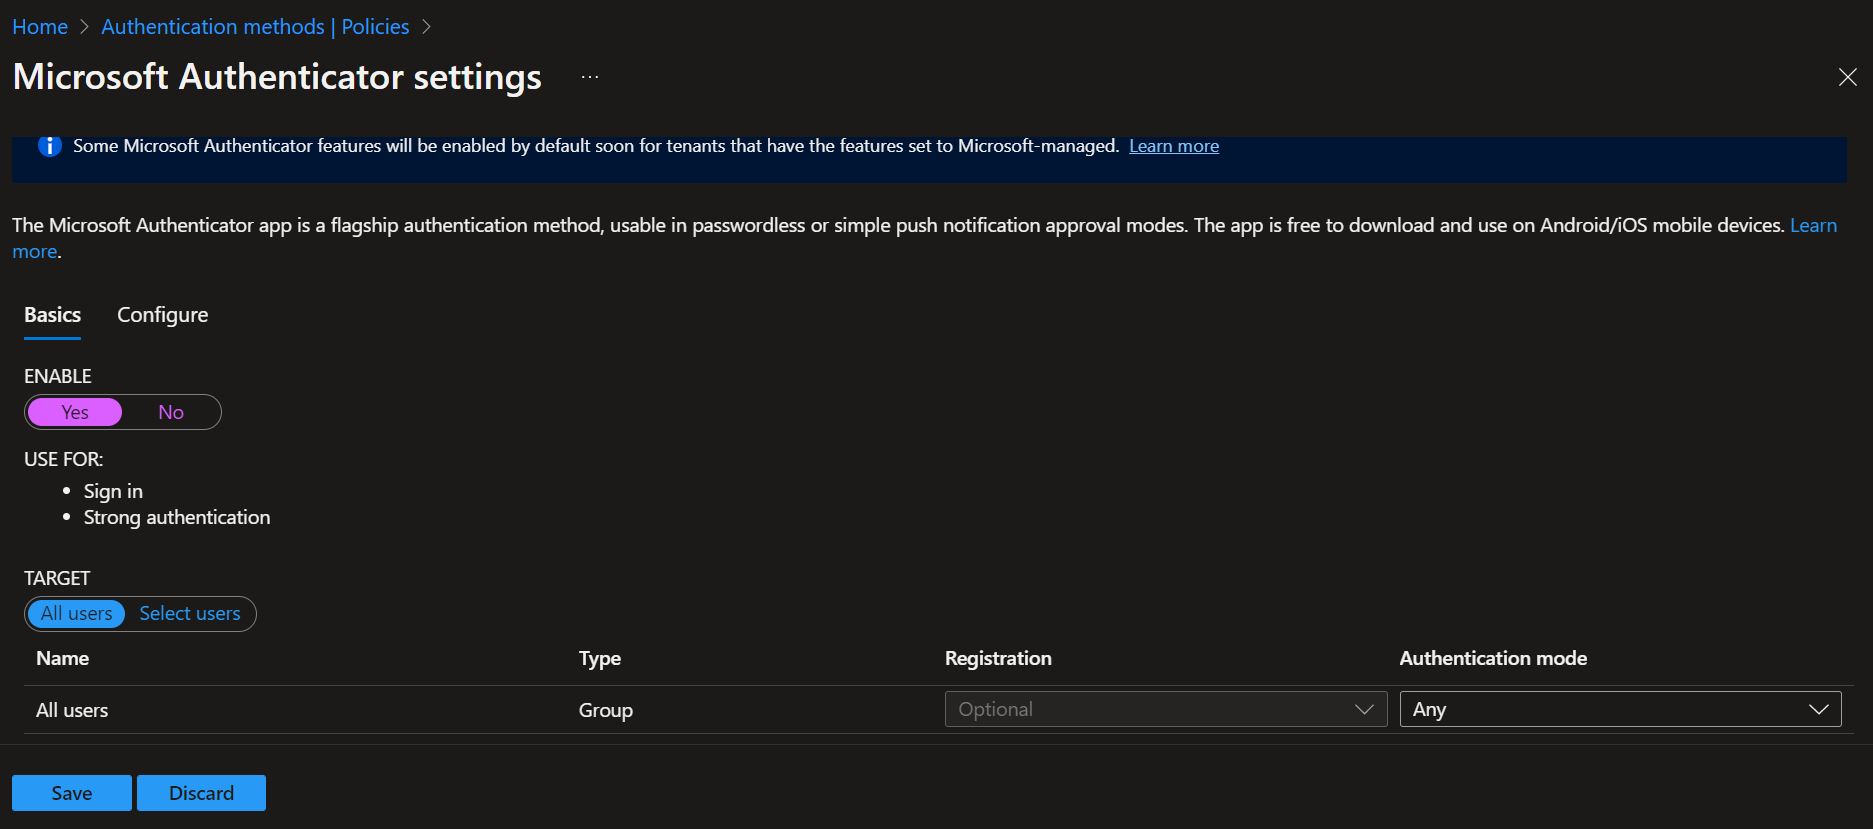
In this menu, you can enable and configure this authentication method. Use the ‘Target’ section to scope it to ‘All users’, or click ‘Select users’, then ‘Add users or groups’, and select the users you want to target with the authentication method.
After selecting the target scope, move to the ‘Configure’ tab.
Step 2 – Microsoft Authenticator >> Configure
These features are actually kind of new, so I’m happy to write about them here.
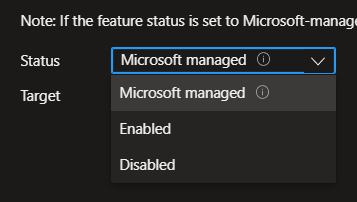
The way that passwordless authentication works for Microsoft Authenticator (by default), is matching a number that’s seen on the screen where you’re trying to authenticate with a prompt in the authentication.
Additionally, app names and geographic locations are not shown.
However, this setting can be changed. If you want to keep this a simple push notification, change the status option on the dropdown from ‘Microsoft managed’ to ‘Enabled’ or ‘Disabled’

You can scope certain settings/configurations to select users or groups as well. Use the ‘Target’ section to scope it to ‘All users’, or click ‘Select users’, then ‘Add users or groups’, and select the users you want to target with the authentication method.
Once your settings are configured, click the ‘Basics’ tab in the menu, then click ‘Save’ near the bottom.
That’s it, you’re all set up. The new features for Microsoft Authenticator are enabled for your tenant. It can be enforced using Conditional Access. Microsoft recently added some features that let you require a certain authentication strength.
I’ll probably be writing more on that stuff later, once more of the issues I’ve encountered in preview are worked out.


